Thursday, July 31, 2014

Bedroom Remodel, Part 3: The first nail is pounded into the wall

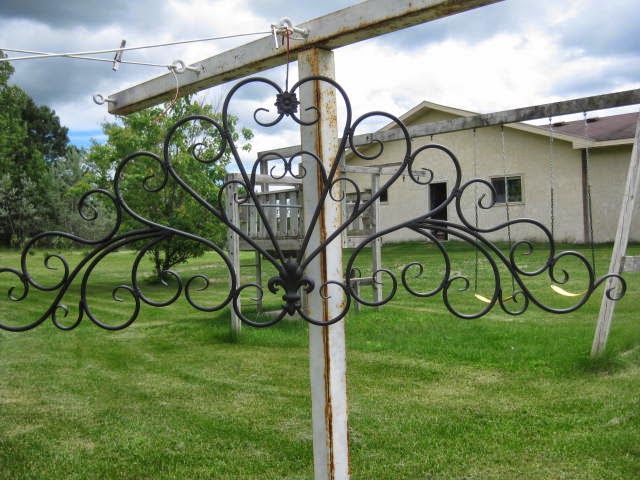
I bought this piece on clearance at Hobby Lobby a couple years ago, knowing it would be perfect for something ... sometime in the future.

Well, the time is right and the place is perfect, and Nick was willing to do the painting.


I'm really happy with how everything is coming together.  Here's what's left:

Red
  • This room must have some red in it!  By some serendipitous set of circumstances, I was able to find a rug I really like for 80% off.  UPS promises I'll see it tomorrow.  
  • I'm trying to buy red ticking for some pillowcases but JoAnn currently has a particularly lame sale on utility fabrics.  ($1 off/yard).  Since this is a $15/yard product, I'll wait until the "sale" is over and use one of their ubiquitous coupons to buy it for 40-50% off.
  • I'm also embroidering some redwork pillowcases.  I actually started one with a pattern I like pretty well but then a new inter-library loan came in with patterns I like really well.  It's a little crazy, but I think I'm going to scrap the first almost-done one and start over with the A-List patterns.
  • Also, I'm pretty sure I want to make a red version of the quilt at the top of this section that WILL NOT cooperate and move down here.

Organizing
  • Right now, toys and extra blankets are in the wardrobe (which also needs to be painted sometime) and H and J's long-term storage stuff is safely tucked under the bed, but there is still a bunch of stuff around the perimeter of the room waiting for J's move and a variety of thumb's up or down judgment calls.  Everyone will have been home by the end of August, so it should all be completed by then.
  • What to do with that toy kitchen?  It fits along the wall, but sure doesn't match at all.  Linus likes to play with it, but will he play down in the bedroom?
More nails in the wall
  • I want to build one of these for the east wall.  I like the idea of being able to change out the art without pounding more nails in the wall.

Wednesday, July 2, 2014

Bedroom Remodel Part 2: Headboard

I've been informally looking for a used headboard for the past year and really haven't found anything I like for a price I'm willing to pay and it was finally to the point where it was holding up the project.

So, inspired by this:

and fueled by nice weather, cheap lumber, and owing a couple decent tools that did all the real work, I made my own.  It also helped that the word "rustic" was part of the original pinterest title I saw.  ("That?  Oh, it's supposed to look that way.  It's rustic!")

We bought the lumber after the parish picnic on Sunday.

And I started putting it together the same evening.

By Monday I was able to prime it.

And today (Wednesday) we installed it!  The only reason it took that long was that I worked two of those days and needed to fit in coats of paint in the mornings and evenings.

Ta da!

This is the first actual piece of furniture I've ever made all by myself and I'm pretty pleased with the results.  Obviously, it's in the beginner range for such things and I can't overestimate the value of having a saw that makes perfectly square cuts all by itself.  Nonetheless, yay me!

Next up, I'm going to vacuum those little piles of sawdust from drilling the holes to attach it to the bed frame and then I'll prioritize what will be stored under the bed and start doing some actual decorating.

NOTES:

  • I used carsiding instead of the 1x4's and 1x6's listed in the instructions.
  • I made mine quite a bit shorter (maybe 10 inches or so).
  • I was going to transfer something from the Graphics Fairy onto this blank canvas, but I tried it on a practice board and decided that I need a LOT more practice before attempting a big project.  


Tuesday, June 24, 2014

And (finally) on to the bedroom remodel: Part 1-paint

I have little use for loft beds and futons anymore, so as soon as Jen moved out this summer we started the big, long-planned, remodeling project for the downstairs bedroom.
Inspiration picture from an old Pier I ad.
Random pins

The overall goals are to get a queen sized bed down there (just in case some married couple wants to visit someday), to get rid of a mountain of daughter-related-no-longer-used clutter, and to have an accessible place to store toys.  (Sorry crawl space, your accessibility status has been rejected.)  I'm hoping the overall vibe turns out to be somewhere in the "summer cottage" realm.

First, we dismantled Nick's bunk and stored it for future use by some grandchildren.  It has some sentimental value and is super sturdy, so I hated to get rid of it.  The black futon, on the other hand, has no sentimental value and little comfort value so I sold that the same day.

The set from the downstairs room is more comfortable and matches Nick's room, so upstairs it went.

Next, I started in that now empty corner and removed the old wallpaper border.

And then moving around the room (and moving boxes, etc. as I went) painted everything the new color.  There are definitely some side effects from only having a north window in that room.  In low light it looks pretty green and in better light it's more blue-ish.  Fortunately, I like them both and think they'll go well with the planned red accents.  I'm also going to be painting a wardrobe some shade of off-white and probably a diy headboard to match, to lighten things up down there.

If I weren't a bum, I'd take out that brown carpet.  That will have to be a project for another day though as I'm pretty sure it would push Dad over the DIY edge.  Instead I'm going to focus on finding some cute rugs that will be usable now and later.

The next project was to do a cheap-o mom version of that cute gingham wall.  I could definitely have found wallpaper, but at $90 (ish) a roll, it was definitely out of my budget, even for one wall.  Instead, I found instructions online for a paint effect and despite the pinterest fail warnings, have decided to go ahead with it.  I thought it seemed safest to go with a more subtle plan, so I scuttled the idea of doing white over the base color and have just gone with a lighter shade of the base.  So far, the cost is a quart of glaze, a small foam roller, and some frog tape.

Nick (patient helper that is is) manned the laser level while I taped last night.

This was taken on June 23 - probably the most sun this room will ever see.

And this morning, I painted the first set of stripes.
Not too much drama.  In fact, I could leave it as is.


It was very easy to paint and the delicate surface frog tape (yellow) worked very well.  The only issue I had was pulling the tape off that metal cover above and left of the outlet.  It's covering a cable tv connection from years ago.  I suppose I should have primed the cover first, because that paint pulled off in one neat sheet.  On the up side, look how nicely the pattern is camouflaging the electrical box cover!  It's hardly invisible, but I am pretty happy with it.

As soon as Nick gets home, I'll tape the vertical stripes and post the grand reveal!

UPDATE WITH FINAL PICTURES:
Surprisingly, the vertical stripes were way more trouble than the horizontal.  Wouldn't you think gravity would be our friend here?
Viola!  Isn't it wonderful?
NOTES:

  • I made a largish sample of the paint colors gingham before I started in on a whole wall.  Since the initial mix of 2:1 glaze to paint turned out to be more opaque than I wanted, I went against manufacturer instructions and added more to make it 3:1.  I have no idea if that will make a difference, but figure I can either learn to love checks instead of gingham, OR I can just take a slightly darker bit of paint and hand paint the intersecting squares to emphasize the gingham effect.  My high capacity for tedium will be helpful, should I go this route. ;-)
  • My biggest fear going in was the possibility of running out of paint mid-gingham and trying to match my Frankenstein mix of white, blue, and glaze.  For the record though, it's hardly using any at all and I'll probably have about 3 cups left over.

Thursday, June 12, 2014

More creative stuff

Inspired by this:

And this huge image file:

And fueled by practically free printing and leftover pieces of wooden floor underlayment, black stain from the cabinet, and a little mod podge, I made these:

I love the map tones on the blue bathroom wall, and I was looking for something that was decidedly not girly.

A couple productions notes:

  • For the first round, I tried spray gluing the paper (cover stock) onto the wood but ended up with lots of wrinkles so I pulled it off and started over.
  • For the next round, I mod podged it in place, still got the bubbles/wrinkles, but it was wet enough that I was able to keep working it as it dried, so I was able to get them all out.
  • I then coated it all with more satin finish mod podge.  It's not my favorite medium (I can always see brush strokes in the finished product), but it was adequate for the need and I'm guessing the two main users of this bathroom will never notice.

Tuesday, June 3, 2014

Creative outlets for super busy me

Picmonkey.com
I've been using this free program for all sorts of graduation-related stuff including N's grad PowerPoint, photo board, and announcements. (Also Facebook banners for personal and conference pages.) It's free and super easy to use and pretty darned versatile. My favorite part, though, is when I went to the save page and saw the quality options labeled as "Roger, Pierce, or Sean."


Centerpieces
Red checked tablecloths with these cute pop bottles/vases on top turned into the decorations for N's grad party.  Hey, he likes pop (and was definitely responsible for emptying several of these), he likes the color red, and he likes the fact that I didn't ask his opinion about decorations in advance.  It was a win for everyone.

I could add "finishing the bathroom," "writing two new FF talks," and "organizing a conference" to the creative list as well, I guess.  Mostly, I'm just looking forward to being caught up on sleep, working with a lot less stress, and perhaps getting back to hand-sewing on Nick's quilt. 

Tuesday, April 1, 2014

Vacation 2015?

Grandma has already reserved a three bedroom condo for January-March next year and she would be thrilled to have any or all or us hang out there for any length of time.  Despite my snarky comments, it's a pretty sweet location and a free place to stay that's a short walk to the beach on a cute, touristy island.

If anyone were interested, they would be kid of the day.

Thursday, March 13, 2014

Points for trying?

It's possible I'm not the most qualified instructor on the topic of contact lens use, but I am an excellent example of persistence and a veritable fount of cautionary tales.

And I can still type with an out-of-date prescription with no bifocal ability.  (but it's likely that photo is terribly blurry)